Showing posts with label the. Show all posts

Friday, June 7, 2013

7 Steps to Keeping the Car Air Conditioner Stay Cold

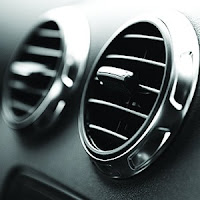
Car Air Conditioner
WE would always hope that the car air conditioner continues to provide the cool air in the cabin. However, if you remember to take care of him? And to keep the car air conditioner durable cold, just need to check the car air conditioner periodically once a year. You should turn off the switch the car air conditioner so as not to be wasted when the engine is turned on, it is useful as the austerity measures. There are parts of the car air conditioner to consider in the treatment measures and this can be done alone at holiday time.

  • Check your car air conditioner hose, if there are leaks or not. Due to leakage of this section may cause the car air conditioner is no longer cold.
  • Also check whether the receiver / dryer is still suitable to be used or must be replaced. Notice the indicator. When damage occurs, a quick change. Because if not, over time the damage will spread to other tools such as the expansion valve, compressor.
  • Check also whether the lubricant is still adequate or need to be added.
  • Clean the condenser. Because as a heat exchange (where the hot air circulation switch), will certainly a lot of dirt accumulate in these parts and can reduce the cold air produced by the car air conditioner.
  • Also check the cooling unit. When this section is dirty, clean it immediately. Because if not, the cold air generated certainly can not break out because of dirt covered with thick walls of his unit. Whats worse, it turns out can cause rust and if a leak can occur during cleaning.
  • Do not forget to check the freon car air conditioner. Still worth it or not. To fill the freon or gas that must be examined first by the car air conditioner repair service.
  • Also check and clean the evavorator this part of the dirt.

Thursday, May 16, 2013

How to Change the Xenon Headlights on a 2001 Audi A4


1. Open the hood and secure it with the safety latch.
2. Remove the T25 Torx screws located at the top of the headlight using a T25 Torx screwdriver.
3. Remove the T25 Torx screws located on each side of the headlight. An extension can be used with the T25 Torx screwdriver to get a better reach.
4. Pull the headlight out and press the metal clip located behind the assembly to detach the headlight from the wire connector.
5. Pull the turn signal bulbs out. The bulbs are located on the side of the headlight assembly.
6. Remove the headlight back cover and press the metal clip behind the bulb to unplug the wiring.
7. Slide the xenon and high beam bulbs out of the headlight.
8. Insert the new xenon and high beam bulbs into the headlight. Wear disposable gloves to prevent oils from making contact with the bulbs.
9. Insert the metal clip to reattach the bulb to the wiring. Replace the headlight back cover.
10. Insert the signal bulb into the side of the headlight assembly.
11. Insert the metal clip to reattach the headlight to the wiring.
12. Replace the T25 Torx screws located on each side of the headlight.
13. Replace the T25 Torx screw located at the top of the headlight.
14. Test the headlight. Turn on the headlights to ensure proper installation.

Saturday, May 11, 2013

2010 SEMA preview Ford teases the Mustangs


After revealing their lineup of Fiestas, Explorers, F-Series pickups and other cars, it was time for Ford to unveil the convoy of custom 2011 Mustangs prepared to take the stage by storm at 2010 SEMA show in Las Vegas.

Read More


2011 Ford Mustang by MRT2011 Ford Mustang by Muscle Mustangs and Fast Fords2011 Ford Mustang by Mobstee2011 Ford Mustang by Street Scene Equipment2011 Ford Mustang by Ford Vehicle Personalization2011 Ford Mustang by Creations n’ Chrome


Press Release

FORD MUSTANG LEGACY AT SEMA CONTINUES WITH POWERFUL, STYLISH VERSIONS OF THE 2011 PONY CAR

  • Ford Mustang is sure to please at the SEMA (Specialty Equipment Market Association) show in Las Vegas Nov. 2-5, where nine Mustangs will show off their performance and style
  • A Mustang GT by Ford Vehicle Personalization uses a white and coral theme along with several Ford Custom Accessories items painted in liquid silver to give this car a look all its own. Other Mustangs show off themes such as breast cancer awareness and street warrior
  • Along with customized versions of Mustang, the 2012 Mustang Boss 302 will give visitors to the Ford stand a look at the reinvented legendary road race machine from the late 1960s


Ford Motor Company is tapping the 2010 SEMA (Specialty Equipment Market Association) show in Las Vegas to showcase nine customized versions of Mustang, displaying the vehicles alongside the new Mustang Boss 302.

"The 2011 model year sets a new standard for Mustang, with everything from bringing back the revered 5.0-liter V8 Mustang GT to the all-aluminum 3.7-liter engine in the Mustang V6 with 305 horsepower and 31 mpg. And it doesnt stop for 2012, with the Mustang Boss 302 reveal and the track-ready Laguna Seca version," said Jim Owens, Mustang brand manager. "SEMA is a great way for Ford to not only show customers whats new for Mustang, but what they can do to make it their own Mustang."

While the 2012 Mustang Boss 302 is sure to impress visitors at the Ford stand, a variety of Mustangs on display also will give consumers an idea of the endless possibilities for making it a one-of-a-kind pony car.

"People understand Mustang and they fall in love with the emotion of the car, but at the same time they want to bring a little of their individuality to the table," said Melvin Betancourt, Ford design manager. "So if youre a Mustang enthusiast looking to set your Mustang apart from others, SEMA is like going into a toy store full of inspirational imagery. At the end of the day you have a Mustang that reflects the personality of the customers vision."

This Mustang GT has a look all its own
A Mustang GT by Ford Vehicle Personalization shows what can be fashioned using Ford Custom Accessories items and some serious creativity. The exterior of the car is coated in a custom white tri-coat color developed by Sherwin-Williams. The paint has coral undertones, a color used throughout the car.

"This theme is a perfect fit for Mustang - it really shows off the design features inside and out that set it apart from the rest," said Mark Conforzi, Ford Vehicle Personalization chief designer. "This Mustang works so well because it will let the customers imagination run wild with just how much they can do to their car."

Ford Custom Accessories items are used to give consumers a sense of what can be done with Mustang, and include a rear pedestal spoiler, rear quarter window louvers, side scoops and a billet grille - all covered in a concept liquid silver finish. The look is rounded out with 18-inch machined liquid silver wheels, similar to the ones standard on the California Special Mustang. To check out the accessories used, visit www.fordaccessoriesstore.com.

The interior of the Mustang features a concept design that uses white and black Ultrafabrics material on a variety of surfaces, with inserts that resemble carbon fiber. The white material is highlighted on the seats, door inserts, steering wheel and dash appliqué. Coral accents also set the mood inside, where they are used on the steering wheel, gauge cluster, shifter knob and air vents. Interior styling also includes coral accent lighting for a unique touch.

Other Mustang project vehicles showcased at this years SEMA show include:

2011 Ford Mustang by Team Baurtwell
West Coast meets East Coast with this Mustang by Team Baurtwell and celebrity customizer Funkmaster Flex, designed for rapper and actor Snoop Dogg. The exterior features Team Baurtwell custom smoked taillights, Funkmaster Flex logos and a 3dCarbon body kit, and is complemented by NC Forged three-piece billet wheels. Chassis upgrades include Steeda lowering kit, sway bars and springs, while Baer brakes provide the stopping power.

2011 Ford Mustang by MRT
Working off a Mustang GT, MRT delivers a tough street warrior theme with carbon effects throughout the interior and engine compartment, a custom color scheme and several performance modifications. A chassis upgrade, performance handling package, upgraded Baer brakes and a new MRT stainless steel exhaust all come together to deliver a performance driving experience for customers.

2011 Ford Mustang by Creations n Chrome
Creations n Chrome is teaming up with the American Cancer Society to raise awareness for breast cancer with its Mustang GT convertible covered in pink chrome. This GT goes from ordinary to extraordinary with a Vortech supercharger, HRE performance wheels and Wilwood brakes. A 3dCarbon styling kit completes the look.

2011 Ford Mustang by Muscle Mustangs and Fast Fords
This powerful 5.0-liter Mustang has been given an extra boost of power with a Ford Racing Performance Parts supercharger kit and exhaust system from Kooks Custom headers. The Mustang also receives a custom paint job, Roush fascia and Cervinis Auto Designs hood. Brakes, seats and suspension are upgraded with American Muscle parts.

2011 Ford Mustang by Mobsteel
This Mustang offers plenty of upgrades to fill the needs of any Mustang enthusiast. An STS
Turbo patented remote mount turbo system, Air Runner suspension and Magnaflow cat-back exhaust all push the V6 Mustang into a new level of performance. Fifteen-inch Baer brakes, Savini forged wheels and Pirelli tires round out the extensive modifications.

2011 Ford Mustang by Raceskinz
The team at Raceskinz took a Mustang with a 5.0-liter and started work inside, where they used a rear seat-delete package complete with new Raceskinz bucket seats. A ProCharger intercooled supercharger, Magnaflow cat-back exhaust and Baer brake system deliver on performance. Raceskinz carbon fiber accessories throughout add an extra touch of customization.

2011 Ford Mustang by Street Scene Equipment
With plenty of stylish detail, this Mustang by Street Scene Equipment combines style, performance and luxury all in one package. The exterior is highlighted by a Street Scene chin spoiler, main grille, lower valance grille and rear wing and valance. The interior offers Katzkin leather and Polk audio amps and speakers for a more pleasurable ride. MINT 20-inch wheels and Yokahama tires put the finishing touches on this pony car.

2011 Ford Mustang by Tjin Edition
This Tjin Edition Mustang GT sports a custom DuPont paint job and will be outfitted with a Webasto sunroof, Unique Fabrication metal wing, Ignited LED headlights and fog lights and StreetGlow lighting. The suspension is modified with a full digital air suspension kit from Air Lift and an Eibach antiroll kit and trailer arms.

The First Muscle Car of American Muscle Car

"Muscle Car" is a term that refers to a wide range of cars with high performance. This term generally refers to the model of car in Australia, South Africa and the Americas. This car is usually a secondary 2-door rear-wheel drive vehicles, has a big powerful V8 engine, and sold at very low prices.

"muscle cars", which first came out between 1960 and 1970. In most cases, the main objective is to race muscle cars on the road. They are different from the GTS and sports cars. This car has two seats or 2 +2, is aimed at tourism and road racing. As the muscle car smaller.

For these types of classic cars, country of origin and age of the car determine the price, but not for the muscle cars. Use the "muscle car" term only occurs after the end of production vehicles. During the time when production of the muscle car is still in its heyday, the American media think of them as "super car".

First Muscle Car - Sample Picture


Muscle Car 69 - 70

Modern Muscle Car - Sample Picture

How to Remove the Rear Door Panels on a 2002 Audi A4


1. Remove the door top trim, which will be wood or plastic. Pull the front edge of the trim away from the door gently until you hear the snaps release. Continue pulling the front edge outward until all the snaps release. Pull the trim forward (towards the front of the car) to release the rear fastener.
2. Remove the screws underneath the trim with a Phillips screwdriver. Remove the screws that are concealed in the door handle. Remove the screw from the bottom center of the panel.
3. Starting at the lower, rear edge of the door panel, slide a plastic scraper between the door panel and the door. Pry the door panel away from the door until the snaps release, working your way around the perimeter of the door. You may need to pull hard to get the clips to release.
4. Pull the door panel up vertically to release it from the door once the panel clips are disconnected from the door.
5. Reach behind the door panel and disconnect the cable that goes to the door handle. Disconnect all of the wires that go to the door for the lights, power windows, etc. Installation is the reverse of removal. If you break any clips during removal, you can source them from your Audi dealer.

Friday, May 10, 2013

How to Replace the Lens on a BMW 325


Removing and Replacing
1. Pull the lever located near the foot pedals on the drivers side of your BMW 325 to unlatch your hood. Face the hood of your vehicle and pull the hood-release lever located in the grille of your car to fully open the hood.
2. Shine your flashlight to the lower right or left corner inside your hood to find the interior part of your corner turn lens. Locate an oval-shaped hole behind the corner turn lens.
3. Push down and outward on the plastic clip within the oval hole with your flathead screwdriver to release the corner turn lens. Continue to keep your screwdriver in place within the oval hole while pulling the corner turn lens out with your free hand. Set the corner turn lens aside for re-installation. Removing your corner turn lens makes the headlight lens accessible for removal.
4. Lift up on the three tabs located on the top of the rubber trim that surrounds your headlight lens with your fingers. Remove the trim to loosen your headlight lens. Set the trim aside for re-installation.
5. Move your fingers around the top of your headlight lens and pull up on the three tabs that secure the headlight lens in place. Repeat this procedure on the bottom of the lens. Pull one tab out from each side of the lens. Pull the lens towards you once all tabs are released.
6. Align your new headlight lens in place. Push it with slight force to snap it into place. Push the rubber trim back into place snapping the connected tabs down. Push the corner turn lens into its original position until it clips back in.
7. Repeat Steps 1 to 7 to replace the headlight on the opposite side of your BMW 325.

How to Change the Cabin Air Filter in a 5 Series BMW


1. Shut the engine off and open the hood.
2. Locate the cabin air filter compartment in the rear (near the windshield) part of the passenger side engine bay.
3. Remove the 13mm bolt from the assembly with a socket wrench. Unplug the pressure sensor connection from the assembly.
4. Flip up the two latches that attach the top part of the assembly. Lift the cover and the cabin air filter from the vehicle (the filter is attached to the cover).
5. Remove the old filter from the compartment cover. Insert the new filter, lining up the filter and cover notches.
6. Inspect the bottom part of the compartment for debris (leaves, twigs, etc.) Remove them from the compartment and wipe it with a dry towel.
7. Insert the top part of the compartment with the new filter. Snap up the two latches, reconnect the pressure sensor and tighten the 13mm bolt.
8. Repeat the process for the driver side cabin air filter.

How to Change the Brake Fluid in a BMW Z4


1. Loosen the lug nuts for the wheels. Lift the car with the floor jack and lower it securely onto jack stands. Remove the wheels and set them aside.
2. Open the hood and remove the lid to the brake fluid reservoir. Use the syringe or similar tool to remove the brake fluid from the reservoir and transfer it to a waste container. Fill the reservoir with fresh brake fluid, filling it past the full mark.
3. Locate the bleeder valve on the right rear caliper, located on the upper, outside of the caliper. Remove the rubber cap so that you can access the nut that loosens the valve. Attach the tube for the bleeder kit to the bleed valve on one end and into a clear plastic container with a small amount of brake fluid in it. Loosen the bleeder valve a quarter-turn with a line wrench.
4. Depress the brake pedal from behind the wheel until you see that the new brake fluid coming out of the caliper and into the container. This may take 15 pumps or more. Check the fluid that is coming out of the caliper periodically and ensure that the brake fluid reservoir is still topped up so that air does not enter the brake system.
5. Tighten the bleeder valve, remove the tube and then reinstall the rubber cap on the bleeder valve. Repeat this process for the left rear wheel, the right front wheel and then the left front wheel until all four corners of the car have been bled. Make sure the reservoir stays full of brake fluid during the procedure so that no air is allowed to enter the brake system. Replace the cap for the brake fluid reservoir.
6. Reinstall the wheels. Lower the car off of the jack stands and tighten the lug nuts for the wheels in a criss-cross pattern.

How to Reset the Oil Change for a 2006 330i


1. Insert the key into the ignition, and press the Start/Stop button on the dashboard, located to the left of the vehicles steering wheel. Do not press the clutch or brake pedal when pressing the Start/Stop button.
2. Press the BC button located on the end of the turn signal lever to display the clock. Hold the odometer Reset button located on the dash cluster until the Oil Canister symbol appears on the dashboard display.
3. Press the Up/Down button located on the turn signal lever until the Oil Canister service item appears on the dashboard display.
4. Press the BC button twice to reset the oil reminder. A small Countdown Timer symbol will appear and disappear from the dash display after successfully resetting the oil change reminder. Hit the Start/Stop button to shut off the vehicle.

How to Replace the Steering Wheel on a BMW


1. Park the car on a flat, level surface with the steering wheel pointed straight. Disconnect the battery cable that goes to the negative terminal.
2. Remove the center horn button/pad on older BMW models that are not equipped with air bags. Carefully pry the pad off with a flat-head screwdriver without scratching the trim. Disconnect the horn button wires from the horn button and set it aside.
3. Remove the air bag on newer BMWs that are equipped with air bags. Loosen and remove the screws on the back of the air bag that hold it to the wheel. The screws will likely be star-shaped Torx bits, so use the appropriate bit to remove them. They also may be recessed into the wheel.
4. Carefully support the air bag as you remove it so it does not fall. Disconnect the wires that go to the back of the air bag and set it aside.
5. Remove the large center nut that holds the steering wheel to the steering column. Use a socket and ratchet with an extension on the socket so that it can reach into the recess in the steering wheel. Set the nut aside.
6. Carefully pull the steering wheel off it. Disconnect any wires that go to the back of the steering wheel.
7. Plug any wires in to the back of the new wheel. Install the new wheel by sliding it onto the steering column if you are installing a different BMW factory wheel. If you are installing an aftermarket wheel such as a Momo, slide the hub adapter that you bought for the wheel onto the steering column.
8. Install the center nut and tighten it, whether you are installing a factory or aftermarket wheel. Install an aftermarket wheel onto the hub with the Allen bolts that come with the steering wheel. Connect the horn wires to the horn button. Press the horn button into place.
9. Plug the wires into the back of the air bag. Install the air bag onto the new wheel (if installing a factory wheel) with the Torx screws. Reconnect the battery.

Thursday, May 9, 2013

How to Replace the Timing Belt on an Audi


1. Lift the front end of the Audi using a jack and axle stands, bringing the front wheels off the ground.
2. Remove the two screws located at the wheel wells and remove the six screws located underneath the underpan (underneath the front end) using a screwdriver.
3. Pull out both lower grilles located beside the fog lights and remove both bolts, turning counterclockwise with an Allen wrench.
4. Pull and detach the hose located at the lower grille on the drivers side to disconnect the headlight washers. Hold a bucket underneath the front bumper as washer fluid will come out and can be reused.
5.
Remove the front bumper of the Audi.
Gently maneuver the front bumper up and down and pull to remove it from the Audi.
6. Unplug the wiring for the horns and the headlights, and pull out the wiring of the turn signal bulbs, located at both sides of the front end.
7. Remove the T45 Torx screws, turning counterclockwise with a T45 Torx screwdriver. There are four on the passenger side and three on the drivers side, located underneath the headlights.
8. Remove the two T30 Torx screws located above the headlights, at the edge where the front of the hood meets, and remove the T30 Torx screw located underneath the sides of both headlights.
9. Gently pull out the lock carrier (a thin plastic piece on the engine that connects to the fan) and unclip the wiring. Unclip the timing belt cover and remove the fan by unscrewing the four bolts located at the center of the fan with an Allen wrench.
10. Remove the A/C compressor belt, located at the front of the engine, by loosening the two bolts at the center of the A/C compressor belt. Maneuver the spring-loaded tensioner (located behind the fan) with a crescent wrench to remove the main serpentine belt.
11. Remove the damper pulley (located underneath the fan) by holding it with a breaker bar and remove the four bolts with a metric wrench. Unscrew the three bolts located at the lower timing belt cover to remove the cover.
12. Line the cam sprocket and valve cover timing marks together by turning the crank, located at the damper pulley, clockwise. Remove the tensioner and guide pulley by removing the three bolts located on the tensioner and the bolt located on the guide pulley. Reassemble the guide pulley with a new tensioner. A new tensioner and timing belt is included in the timing belt kit.
13. Remove the bolt located on the brass-colored part of the guide pulley in order to install the new timing belt. Pull off the timing belt and slide the new timing belt over the sprockets, then turn an Allen key clockwise in the hex hole of the guide pulley and reattach the brass colored piece. Pull out the pin on the new tensioner.
14. Repeat the steps in reverse on the Audi.

The New Mazda6 is Impressive

new Mazda6
The excitement surrounding the new Mazda6 has the manufacturer carefully constructed. The climax of it took place in Moscow during the auto show where the fabric of the new Mazda6 is drawn. The newcomer, who continued as a sedan and station wagon will be available, is lighter, more economical and especially attractive lined.

Thanks to the Kodo design language, the Mazda6 itself a new suit fitted. The CX-5 was the first one it came out and now the six undergoes a change of generation is of course in a similar outfit outlet. Kodo is based on a predator with tense muscles slightly leaning back, ready to pounce on its prey. This philosophy has been the last few years more the premise of sportier cars. Mazda introduced the Kodo (Soul of Motion) design language already in 2009 by the Shinari concept and in 2010 with the Takeri, the concept on which these six is based. With this brand new model that is in shorter overhangs front and rear, a deep cut front, a wide, low grille and headlights that is most reminiscent of leopard prying eyes. Mazda remains quite close to them near the study model. That the lines on the bonnet which overflows into the flanks and gives more three-dimensional effect. That is definitely this time.

Grown
the new Mazda6 is 4, 87 m tall and has a wheelbase of 2.83 m the interior is again what become broader. Getting back knees 4.3 cm extra space and legroom increased by 3.7 cm. The chairs were designed with comfort in mind that the seat 20 mm longer and 33 mm higher backrest was. Inside Mazda opted for better coating: the panel’s softer feel and finish is improved. The ease of use is increasing, thanks to the HMI button in the center console. This allows, inter alia, navigation, audio, and the like are operated.

SKYACTIV and i-ELOOP
In the Mazda6 applied the manufacturer also SKYACTIV principle. Engines, chassis, transmissions and body were developed to such emissions and fuel economy, and with a drag coefficient (Cd) of 0.26 makes no competitor better. In the same corner we denote i-ELOOP, a system of charging a capacitor when the driver stops to touch the accelerator, known as. This capacitor should be as air conditioning systems and radio energized and the engine of this task is unloaded. Equally important is the fact that the new 6 despite its increased size and luxury with a whopping 50 kg.

Sports First Break
Of course, the "new Mazda6" also as important premiere at the Paris Motor Show stand. He will be flanked by 6 Sport Break in Europe as the first on the market. The launch is scheduled for October of it; the sedan is a few months later. Details on the engines and transmissions keep the Japanese a little behind the hand, though you have no crystal ball to predict that the diesel engines of the CX-5 and its two liter petrol engines make their way to the forecastle of the 6 will find.

Everything You Need To Know About The 2012 Toyota Prius Lineup


At the 2011 Detroit Auto Show, Toyota unveiled two all new Toyota Prius cars. One is called the Toyota Prius C. The other is called the Toyota Prius V.

Right now, both are concept cars. These are prototype vehicles meant to show off new technologies and new styling. According to a news release from Toyota, some form of the Toyota Prius C will hit the market sometime in 2012.

The Prius V should hit sometime late in 2011.

To help you get a taste for what is in store, here is what you need to know about the Toyota Prius C and the Prius V. 

The C Stands For City

The Toyota Prius C will be a city car for a young generation of drivers. It will be the third car in the Prius hybrid family. It will join the Prius (third generation) and the Prius V.

The Prius C will be a compact car made for city driving. Because of its small size, this hybrid car is expected to get excellent gas mileage.

The exterior of the vehicle has a similar styling to the current third generation Prius. However, the new vehicle has a smaller, streamlined look. At the 2011 Detroit Auto Show, the hybrid car featured a vibrant blue paint color and a sporty style of wheels. 

The V Stands For Versatility

The Prius V will be a larger, family oriented vehicle. According to the Toyota news release, the Prius V will have more leg room than the current third generation of Prius cars.

It will also feature 34.3 cubic feet of cargo space behind the rear seats. This would make it the most spacious hybrid car on the market. It probably would also rival some standard and hybrid sport utility vehicles.

The exterior of the vehicle would retain the standard Prius triangular shape. However, the car would feature improved aerodynamics as well as a refined backdoor panel.

According to the Toyota news release the Prius V would have the following specifications:

Length: 181.7
Width: 69.9
Height: 62.0
Wheelbase: 109.4
Wheels: 16-inch alloy, 17-inch allow (optional)
Engine: 1.8-liter four-cylinder
Horsepower: 98 hp
Drive System: Front wheel drive
Battery: Nickel metal hydride

Most importantly, the Prius V would features 42 miles per gallon for city driving and 38 miles per gallon for highway driving. Combined that is 40 miles per gallon.

Other Vehicles

In 2012 Toyota will also feature a plug-in Prius. According to the news release, it will be able to be driven up to 13-miles on plug in battery power. Once that power is depleted, it will work similar to standard Toyota Prius cars.

This new lineup of hybrid vehicles will probably change the hybrid car landscape. In the mean time, people can purchase the standard third generation Prius.


Wednesday, May 8, 2013

Chevrolet Colorado concept debut at the Bangkok


Chevrolet has releases first details and photos for Colorado concept, which will debut at the Bangkok International Motor Show.

The redesigned Colorado will be larger than the current version, which is a compact. Combined, mid-sized and compact pickups accounted for 16.5 percent of the total U.S. pickup market last year, according to the Automotive News Data Center.

The concept Colorado features a 2.8-liter turbodiesel engine, 20-inch wheels and all-wheel drive. Dont expect the diesel here in the U.S.--a range of gasoline engines is far more likely.

The interior gets a Chevy-heritage dual-cockpit design. The instrument panel includes a seven-inch LCD screen for controlling audio, navigation and hands-free phone functions.

The new Chevy Colorado goes on sale in Thailand later this year, so the concept is right-hand drive. But the development program is for a global vehicle, so were likely to see many elements from the Thailand truck show up on the U.S. version of the Colorado and its GMC counterpart, the Canyon.


Chevrolet Colorado conceptChevrolet Colorado conceptChevrolet Colorado conceptChevrolet Colorado conceptChevrolet Colorado conceptChevrolet Colorado conceptChevrolet Colorado conceptChevrolet Colorado conceptChevrolet Colorado conceptChevrolet Colorado conceptChevrolet Colorado conceptChevrolet Colorado conceptChevrolet Colorado conceptChevrolet Colorado conceptChevrolet Colorado conceptChevrolet Colorado conceptChevrolet Colorado conceptChevrolet Colorado conceptChevrolet Colorado conceptChevrolet Colorado concept


Press Release

Chevrolet Unveils Colorado Show Truck


Boldly styled show truck previews next-generation midsize pickup

BANGKOK, Thailand - Chevrolet today revealed the Colorado Show Truck in advance of the Bangkok International Auto Show, where it is making its global public debut. The concept previews the next-generation Colorado midsize pickup truck, which will build on Chevrolets strong truck DNA and award-winning heritage. The Colorado goes on sale in Thailand later this year.

"Thailand is the worlds-largest market for midsize pickups, so this was the perfect location in which to unveil our new Colorado," said Susan Docherty, vice president, GMIO Sales, Marketing and Aftersales. "Trucks have been part of Chevrolets core for nearly all of its 100-year history. The Colorado reinforces that heritage with expressive design, refinement and uncompromising capability."

The show truck features an extended-cab body atop a high-stance AWD chassis and rides on large, 20-inch wheels and off-road tires. Power comes from an efficient 2.8L turbo-diesel engine, which produces a broad torque band for excellent cargo and towing capability.

"Although this is a show vehicle, the basic proportions and form convey the vision for the next-generation Colorado that we will bring to market," said Brad Merkel, GMs global vehicle line executive. "It reflects a stylized version of the new truck, one that takes into account rugged dependable truck capabilities for commercial use as well as sophisticated refinement for personal-use needs."

While the new Colorado was developed within GMs global product development organization, engineers took careful steps to ensure it would meet local market needs. Roberto Rempel, GMs global vehicle chief engineer, lived in Thailand for several months during the trucks development, immersing himself in the market and observing how the Thai people use their trucks and the road conditions they experience.

"Pickups are instrumental in the vibrant Thai economy and owners take great pride in their trucks, which are used for both work and personal driving," he said. "These customers ask a lot of their trucks, so the powertrains and chassis must be very robust to earn their trust - and thats exactly what weve delivered."

Design details

The Colorado show trucks purposeful design conveys strength through bodywork that appears tightly wrapped over the chassis and a wide, confident stance. In the front, Chevrolets internationally recognized gold bowtie and dual-port grille are framed by large headlamps that flow into the front fenders, and an extractor vent on the hood.

"Around the globe, pickup trucks are associated with strength, capability and function - and thats exactly what the Colorado show truck embodies," said Ed Welburn, GM vice president of Global Design. "Its broad-shouldered proportions are derived from nearly a century of Chevrolet truck heritage."

Pepperdust Metallic exterior paint is accented with polished aluminum details in the fascias, as well as integrated side steps and black-masked projector-style headlamps with LED lighting elements. At the rear is a full-width LED-lit taillamp, which creates a striking appearance when illuminated.

Additional exterior details include:

A streamlined "cab collar" design with a body-color hard tonneau cover on the bed
Gray accents on the side, front and rear lower moldings
20-inch aluminum wheels featuring a "liquid metal" finish, with Stone Gray color wheel ports
Cooper 285/50R20 ZEON LTZ tires
Outside mirrors with LED turn-signal indicators.
Inside, theres another signature Chevrolet cue: a dual-cockpit instrument panel design. It flows into the doors, with continuous lines that create a floating, wraparound effect, amplifying the Colorados feeling of spaciousness. Ice-blue lighting and high-quality, "double-faced" leather-trimmed seats add sophistication and refinement.

"The interior is designed to deliver a premium and inviting environment, with a greater feeling of spaciousness than is typically found in midsize trucks," said Welburn. "Theres also great attention to detail in the execution of the features you see and feel."

A brace of motorcycle-inspired, three-dimensional gauges stand out on the instrument panel, projecting a sporty appearance.

Contrasting trim used with the light-colored leather seating, dark wood trim accented with chrome and low-gloss and soft-touch materials are used throughout for a premium feel. A number of storage compartments are located throughout the interior, including a covered center bin for concealment of valuable items, and a large, dual glovebox.

Additional features include a dual-zone, digital climate control system and the latest in "infotainment" technology. The show truck highlights an ergonomically positioned 7-inch LCD display in the center stack, for easy viewing and intuitive control of Web access, navigation, music and hands-free phone features.

More details about the production model will be released later in the year.

How to Update the Navigation With a DVD


1. Contact your local car dealer and purchase the latest update for your DVD-based navigation system.
2. Locate your cars manual and go to the Navigation section. Follow the instructions to open the DVD drive of your navigation system. This can be as simple as pressing a button on the navigation units fascia, which will then open the unit and allow you to take out the current DVD the system uses.
3. Slide in your new DVD and the navigation will update automatically. You are now ready to use your updated navigation system.

How to Change the Battery on a BMW Remote


1. Ply the small rectangular door off the back of the remote.
2. Remove the two screws underneath the rectangular door.
3. Pull the back cover off the remote.
4. Replace the old battery with a new one.
5. Reinstall the back cover, and reinstall the two screws that retain it.
6. Reinstall the small rectangular door on the back of the remote.

How to Remove the Front Bumper of an Audi TT


1. Park the Audi TT on a level surface and set the parking brake. Place a wood block behind the rear tire to prevent the vehicle from rolling.
2. Lift up the front end of the vehicle with a floor jack and place two jack stands, one next to each front tire under the front axle. Lower the vehicle so it is resting on the jack stands.
3. Disconnect the cover on the top of the water bottle near the front of the engine compartment by hand. Detach the battery cover on the drivers side of the engine compartment near the front, removing the plastic pegs with a flat-head screwdriver.
4. Take the plastic cover off the front of the vehicle by hand and locate the six Torx bolts on the front bumper. Disconnect the Torx bolts with a Torx bit and socket wrench.
5. Unfasten the two screws underneath the front bumper with a Phillips screwdriver. Detach the two bolts---one on each side---in front of the tires in the wheel wells with a socket wrench.
6. Pull the bumper down carefully and locate the Torx screws inside the ends of the bumper. Remove the Torx screws with a Torx screwdriver and lift the front bumper off the Audi TT, setting it aside.

How to Rotate amp Balance the Tires on a BMW X5


1. Loosen the lug nuts that hold the X5s wheels on. You may want to use a breaker bar on the end of the tool that you are using.
2. Lift the BMW with a heavy duty floor jack and lower it onto jack stands at all four corners. Finish removing the lug nuts and the wheels, noting which corner of the vehicle each wheel was installed on.
3. Transport the wheels and tires to a tire shop with another vehicle so that the tire shop can balance the tires for you. Balancing tires should never be undertaken by an amateur, as it takes special tools and skills. Even if you have access to the equipment, do not do this unless you are familiar with the process of balancing tires.
4. Transport the wheels and tires back to where your X5 is supported on jack stands. If your X5 has the same size tires at all four corners, move the left rear wheel and tire to the left front, the left front to the back, the right rear to the front and the right front to the back.
5. If your X5 has staggered wheels, that is if the rear wheels are wider than the front wheels, do not perform any rotating. Simply replace the tires when they are worn. Lower the BMW off of the jack stands. Tighten the lug nuts on the wheels by hand with a tire iron.

How to Find the Radio Reset Safe Code for a 2001 Audi


1. Determine the model of your radio. Since it is a 2001 model, the radio is likely a Symphony or Concert.
2. Look at the front of the cars radio and locate its model number. Write this number down.
3. Call your Audi dealership and provide them with the radios model and model number. Request the anti-theft code needed to reset the radio. Write this number down.

Tuesday, May 7, 2013

Perk up your Ford vehicle parts to the leading Ford parts store offered


Sure, your Ford is something special car, truck, minivan, or SUV, whether it involves a new or old Ford model. You take care of; You will receive in the same way as you self care. As well it should be unique, particular and different than the rest of the cars on the road. A different look and sign shops is online specialized for your Ford just today with thousands of car parts new and used on the sale of Ford parts.

It is a business, the you with exquisite Ford parts discount offers and a wide range of spare parts and accessories for virtually all Ford models, Ford parts onlineallows. Update auto parts aftermarket and replacement Ford available here great ways, customize and redesign car to provide your old and new Ford. Here you will find all new spare parts Ford F150 pickup, Ford Ranger parts and Ford Explorer parts. Ford Mustang parts Ford Mustang parts and Ford Pinto are also available.

No matter how good your Ford vehicle is you can make it better and that is why stores like Ford offer parts online with large selection of auto parts, so that you find the right parts you need to improve skills driving your vehicle, see outside, security, comfort and convenience features.

The auto parts you can replace to restyle your car includes Ford Bronco bumper (front), Ford focus mesh, Ford Ranger mirror and Ford Mustang lights. Car lights in this store offered include lights, Ford front lights and Ford Ford Altezza tail lights. By replacing these parts or additional lamps, mirrors and a grill, such as you make your car unique and much more fun to drive. In addition this auto parts are primarily useful you keep safe as you drive.

The Ford Expedition bumper is the part of your car that absorbs the impact of a collision by redirecting the force in the frame rails. Therefore, damage to the car and the occupants are avoided or reduced. Lights are also very important security components in your car, Ford escape, as they are visible, see your car while you drive down the road or they Park. Lighting offer to drive lighting for you and give a signal as you disable, stop, back up or move to a different track.

High-performance are available in the store Ford F150 pickup truck engine parts, which you can use to update your Ford performance. In addition this auto parts can help to improve your Ford fuel economy, as they make possible more efficient combustion of the mixture in the Interior of the engine air and fuel.

Add all this Ford parts with some interior in many aftermarket parts dealers available. In the meantime Ford parts online over and see the wide range of premium quality auto spare parts for Ford. Discount Ford parts waiting for bargains on almost all products to you. It is surprisingly easy, fast and at low cost to drive your Ford much more exciting to here on the country leading Ford parts dealer.